Setting Up DietPi on a Raspberry Pi
![]() “As an Amazon Associate I earn from qualifying purchases on this page. Thank you for your support."
“As an Amazon Associate I earn from qualifying purchases on this page. Thank you for your support."
As you can tell from my blog, I want to optimize and run my projects as smoothly and affordably as possible. DietPi became the solution I didn’t know I needed until I stumbled on it many years ago. DietPi is a lightweight and optimized operating system designed for single-board computers like the Raspberry Pi but it has gathered support for multitudes of hardware including virtual machines! It provides an efficient, streamlined alternative to Raspberry Pi OS, making it ideal for users who want to maximize performance while minimizing resource usage. It doesn’t matter if you are just setting up a one and done project or a complete server stack, for a single SBC setup, this has become my default go to that offers a simple yet powerful solution.
In this guide, we’ll walk through the base steps to install and configure DietPi, ensuring a smooth setup and a baseline for how my other projects build on this so that you can replicate or come up with your own solutions.
1. What is DietPi?
DietPi is a Debian-based OS that prioritizes efficiency and ease of use. Some key features include:
- Lightweight and minimal: Uses fewer system resources compared to Raspberry Pi OS.
- Optimized performance: Pre-configured tweaks for better CPU and memory management.
- DietPi-Software: A built-in tool for easily installing and managing software packages.
- Automated setup: Initial configuration is streamlined for quick deployment.
- Broad hardware support: Works on Raspberry Pi, Odroid, and other SBCs.
If you’re looking for a hassle-free OS that gets the most out of your SBC hardware, DietPi is an excellent choice.
2. Required items
We want this to be as affordable as possible so to keep this in line, we want the nessicary items to get up and running to be reasonable as well. Some of the items you may have laying around or are no longer avalable for purchase so I’ll break this up into 3 categories; Salvage: using older/upcycled components, Minimal: If you had to buy the cheapest of everything to get started, and Recommended: If you need to buy everything but want to get a better experiance.
- Salvage Total Cost: ???
- Raspberry Pi 1 / Raspberry Pi Zero (1) (Technically you can still buy them because the company offers YEARS of support but the cost new is the same as newer and more powerful components)
- 1GB SD Card Raspberry Pi 1 / 1GB microSD Card Raspberry Pi 0
- 0.5A USB power supply. (USB Port on a TV/Router/Printer etc)
- Micro-B USB Cable if needed
- Minimal Total Cost: ~35 USD
- Raspberry Pi Zero 2 W (Cost $15 USD)
- 4GB MicroSD Card (Cost ~$5 USD)
- 2.5A USB Power Supply (Cost $15 USD)
- Micro-B USB Cable if needed (Cost $1.50 USD)
- Recommended Total Cost: ~$60 USD
- Raspberry Pi 4 (Cost $35 USD)
- 128GB microSD card MicroSD card with an A2 rating (Cost ~$12 USD)
- 5A USB Power Supply (Cost $12 USD)
- C USB Cable if needed (Cost $1.50)
2. Downloading and Preparing the Image
To get started, download the latest DietPi image from the official website. Personally, I run my setup on a Raspberry Pi 5 but we can easily run these setups on pretty much any version just use the right image. For my demonstration here, I will be using the Raspberry Pi 4.
Steps to Prepare the SD Card
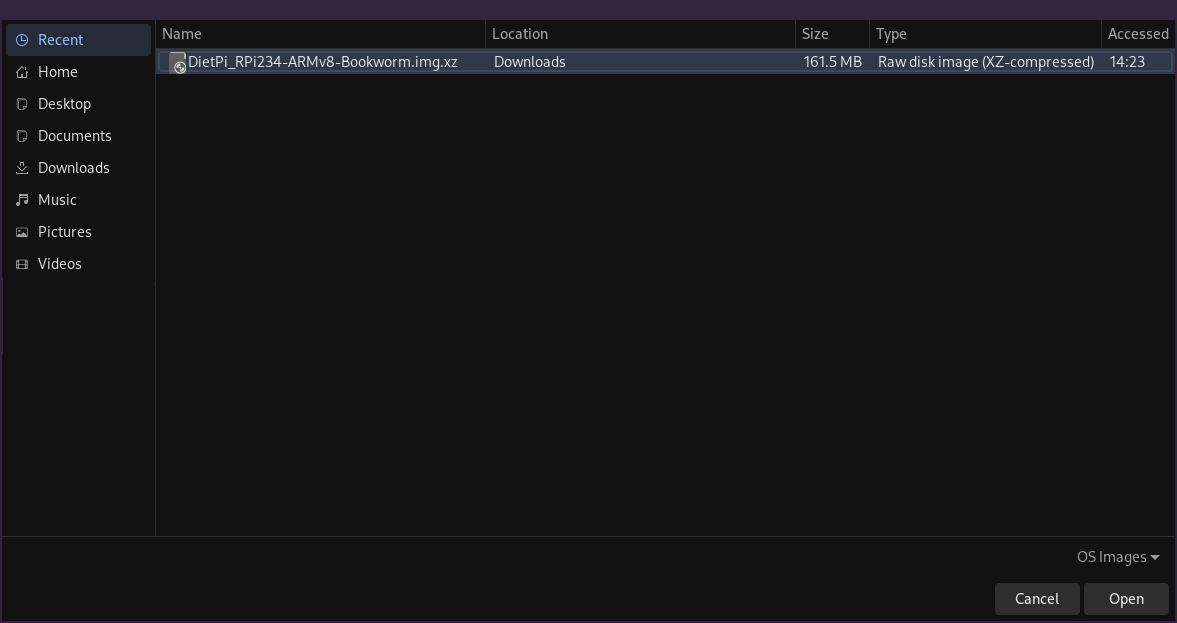
- Download the Image: Choose the appropriate version for your device. In my case, I am choosing the Raspberry Pi 2/3/4/Zero 2 image; DietPi_RPi234-ARMv8-Bookworm.img.xz
- Flash the Image:
-
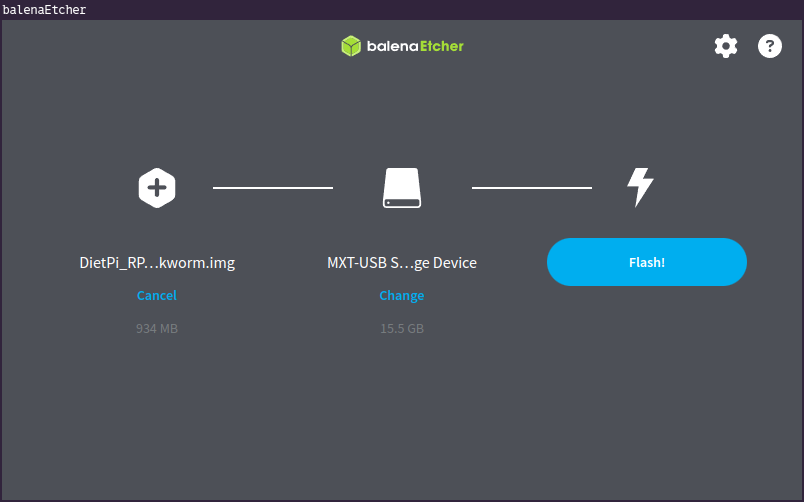
Use BalenaEtcher (Windows/Mac/Linux) or the
ddcommand (Linux/macOS) to write the image to an SD card.- Start BalenaEtcher
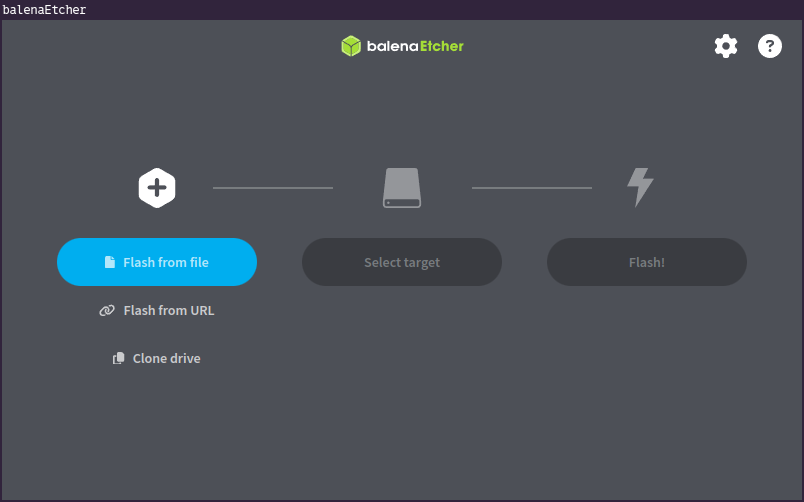
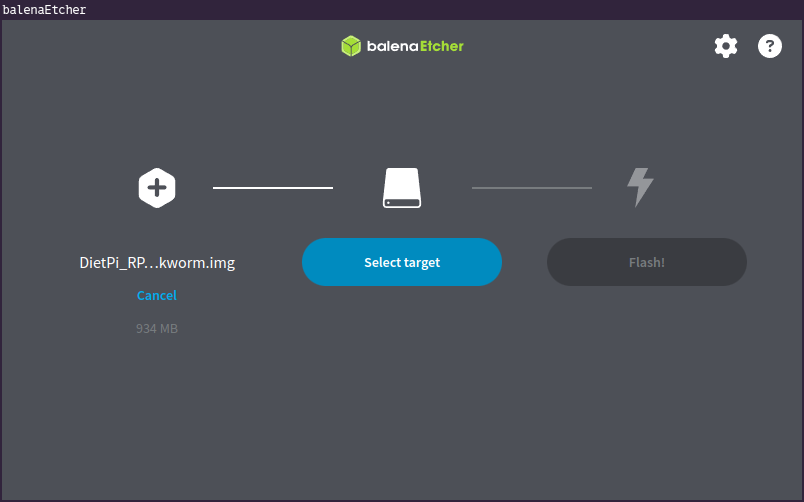
- Select your the file you downloaded (DietPi_RPi234-ARMv8-Bookworm.img.xz in my case)
- Click “Select Target”
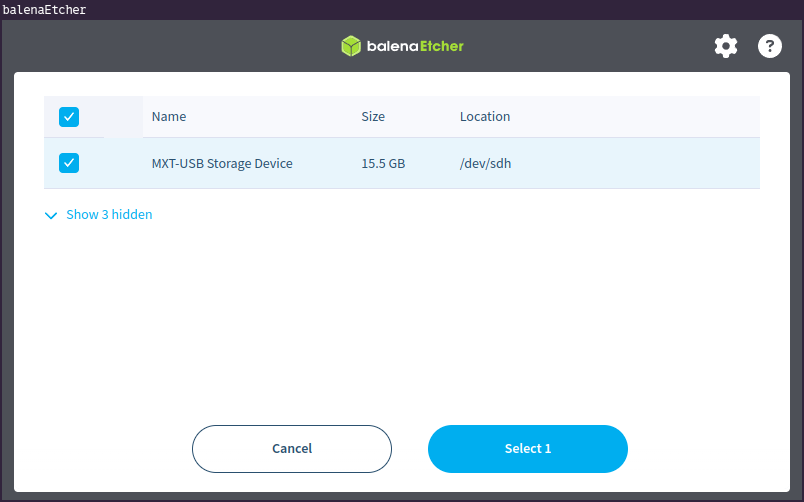
- Select The drive to install DietPi onto (WARNING Please remember to verify the location you are installing to as it will wipe everything from that drive)

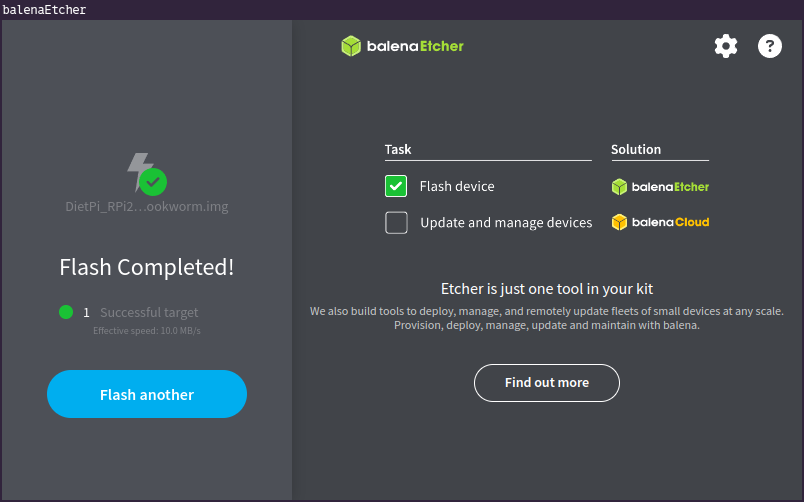
- Hit “Flash!” and wait for it to complete
- BalenaEtcher will decompress the image..
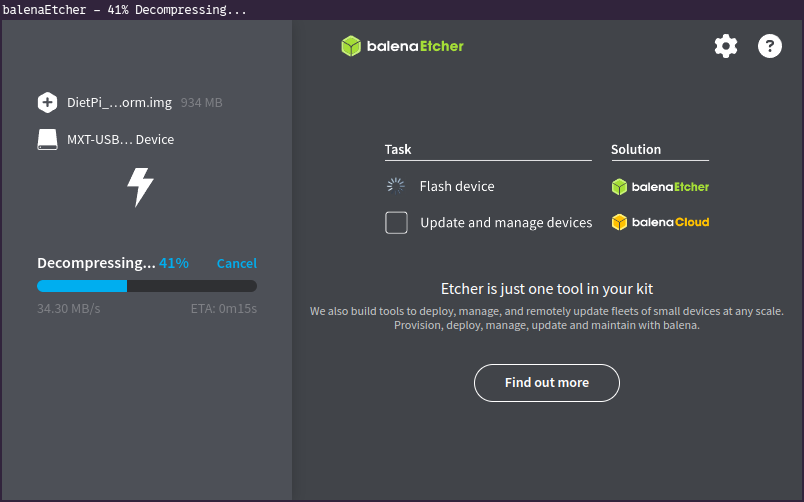
- Write the image..
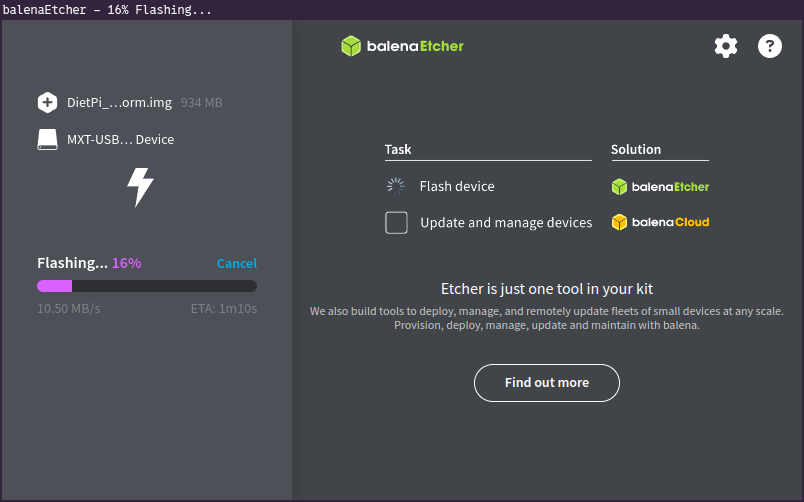
- Verify the image..
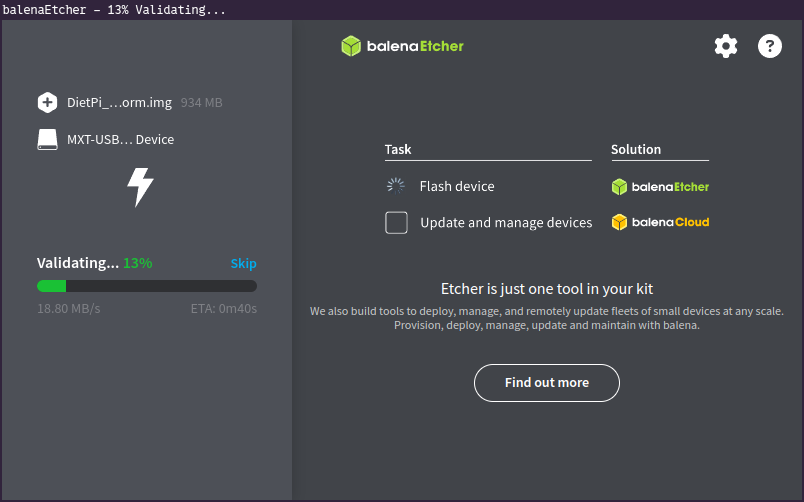
- Baring no issues, you will get a “Flash Completed!” message.
- Start BalenaEtcher
-
Using XZ and DD (Since the IMG file is most likely compressed we will chain the two commands together)
- Example
ddcommand for Linux users:
xz -dc /path/to/Dietpi.img.xz | sudo dd of=/dev/sdX bs=4M status=progress(Replace
/path/to/DietPi.img.xzwith the location of your xz compressed image and replace/dev/sdXwith your SD card device name.) - Example
-
- Setup Wifi (Optional)
- For Wi-Fi, I find it easier to set that up while still plugged into the computer I flashed the SD card with so I have a completely headless (no monitor attached) system ready to work regardless of Wired or Wireless network access.
- Look in the FAT32 partition of the SD card and open a file named ‘dietpi.txt’ Find ‘AUTO_SETUP_NET_WIFI_ENABLED’ and set to value 1
- Find ‘AUTO_SETUP_NET_WIFI_COUNTRY_CODE’ and set to your two digit country code (I am in the United States currently so I will use ‘US")
- Save the file
- In the same partition, open the file named ‘dietpi-wifi.txt’
- Find ‘aWIFI_SSID[0]’ and set to the name of your wifi
- find ‘aWIFI_KEY[0]’ and set to the password of your wifi network so it should look like this:
... aWIFI_SSID[0]='MyHomeNetwork' ... aWIFI_KEY[0]='SuperSecretPassword' ... - Set Static IP (Optional)
- This is optional but you can set a static IP for your DietPi system as it will make finding and logging into your DietPi a lot easier when you are running headless. Of course you can always set this static in your router or just leave it dynamic for now.
- In the dietpi.txt file we were in earlier, you will see:
and you will want to change “AUTO_SETUP_NET_USESTATIC” to 1 and adjust the following 4 fields to match your network. If you are unsure what your network is.# Enter your static network details below, if applicable. AUTO_SETUP_NET_USESTATIC=0 AUTO_SETUP_NET_STATIC_IP=192.168.0.100 AUTO_SETUP_NET_STATIC_MASK=255.255.255.0 AUTO_SETUP_NET_STATIC_GATEWAY=192.168.0.1 AUTO_SETUP_NET_STATIC_DNS=9.9.9.9 149.112.112.112 - Insert the SD Card into your Raspberry Pi and power it on.
3. Initial Boot and Configuration
First Boot Process
- On first boot, DietPi will perform an automated system setup and update process.
- The system will reboot once or twice—this is normal.
Networking Setup
- If using Ethernet or your followed my steps in 2A for setting up Wi-Fi, DietPi will automatically connect to your network.
Remote into your DietPi
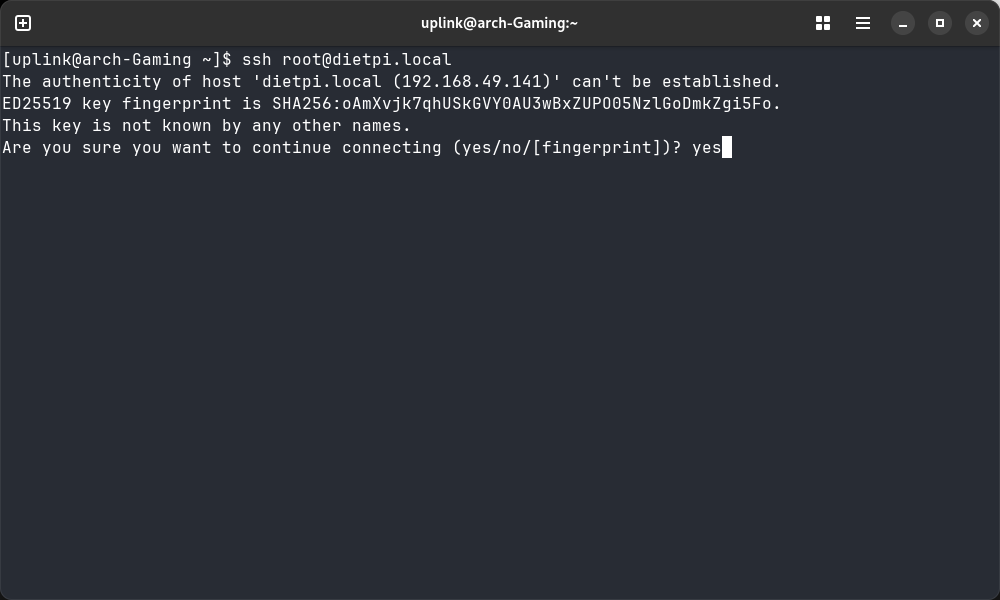
- This is where the fun really begins! We get to SSH into our new system. Since this is the first time using SSH to connect to this system, you will receive a warning asking “Are you sure you want to continue connecting?” Answer “Yes” and hit enter.
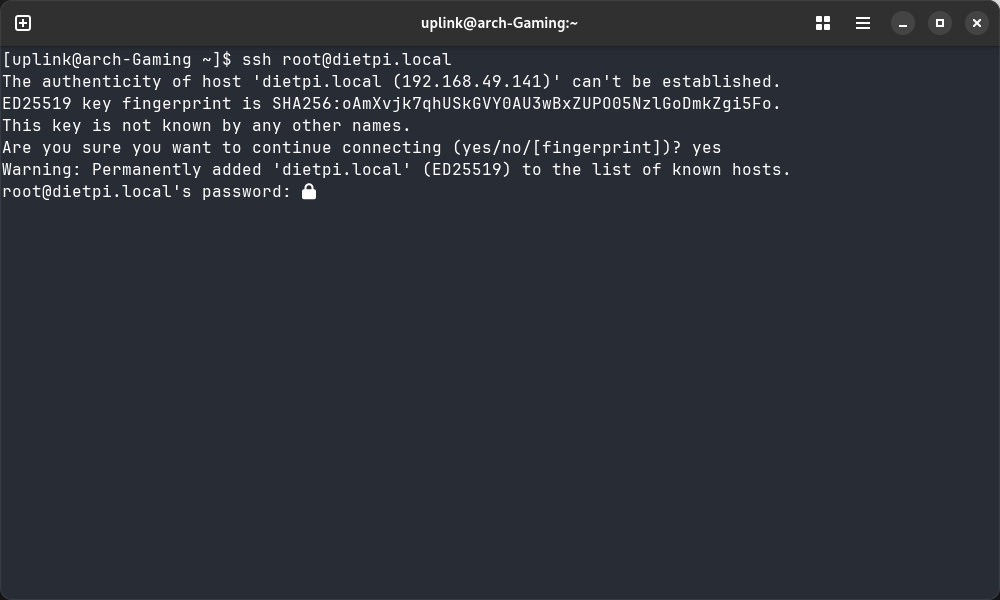
- If you set a static IP, you can SSH to that address with default credentials:
login: root
password: dietpi
- You will get a prompt asking for a password. It depends on your terminal but generally there is no confirmation of input and it stays blank. That is normal. Just type in the password and hit Enter.
- If you are not sure what your IP is, you can do a few things. The easiest being is try to SSH to the default hostname which is “dietpi” so you would run:
ssh [email protected]If that doesn’t work, you can log into your router and find your system or use a tool like NMAP to scan your network.
First Login
-
The first time you login, You will follow a series of prompts to continue. You will use your arrow keys and the TAB key to move with the Enter key to select.
-
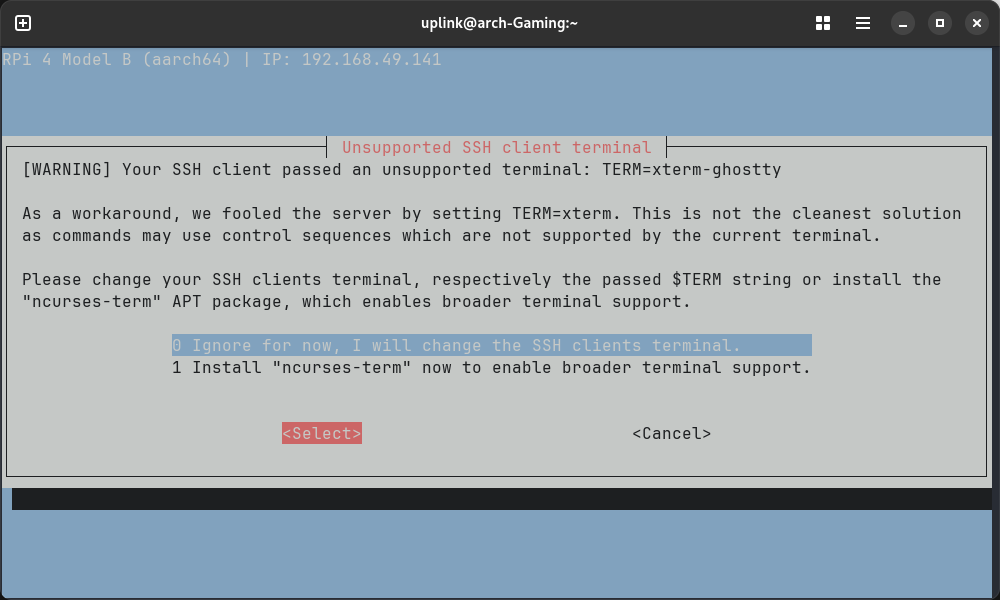
If you get a prompt “Unsupported SSH client terminal” use your arrow keys to select “0 Ignore for now, I will change the SSH clients terminal.” Hit TAB to highlight “Select” and hit Enter.
-
You will then see Dietpi running a bunch of commands. What it is doing is checking network access, free space, if there is updates avaliable, downloading and installing those updates if applicable. This can take a little bit of time depending on your network connection.
-
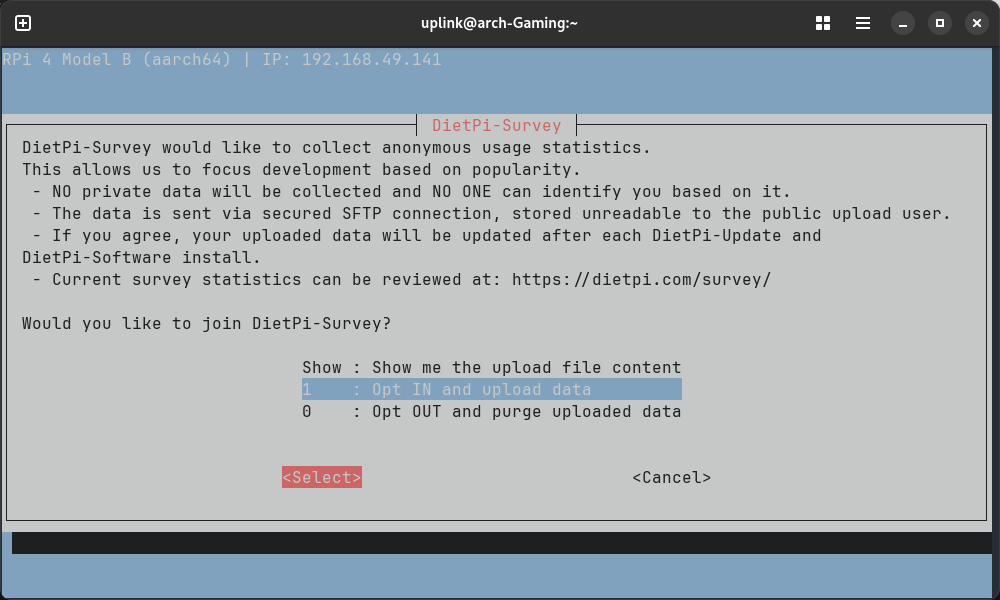
Once the updates are downloaded and installed, you will get a prompt for “DietPi-Survey”. What that does is each time there is a “DietPi-Update” or “DietPi-Software” install, it uploads those programs to the team so they can focus development on programs that are being used. I highly recommend Opting In and helping support the team by selecting “1 : Opt IN and upload data.” Hit TAB to highlight “Select” and hit Enter. You can see their current collection of survey data at https://dietpi.com/survey/
-
DietPi will proceed to run checks to make sure it is up to date.
-
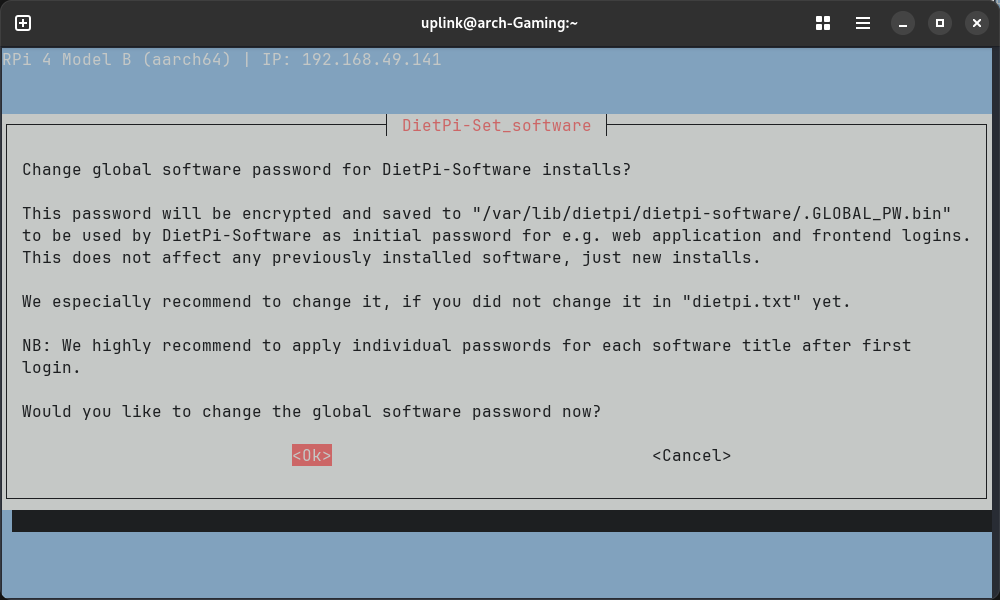
You will get a prompt asking you to change your global software password if you didn’t change it in the dietpi.txt file. Recommended
-
Next you will be asked if you want to change the login password for “root” and “dietpi” users. Highly Recommended

-
The follow-up question will ask you if you want to disable serial/UART console. Unless you plan on using it, I recommend selecting “Yes” and hitting Enter to disable it.

-
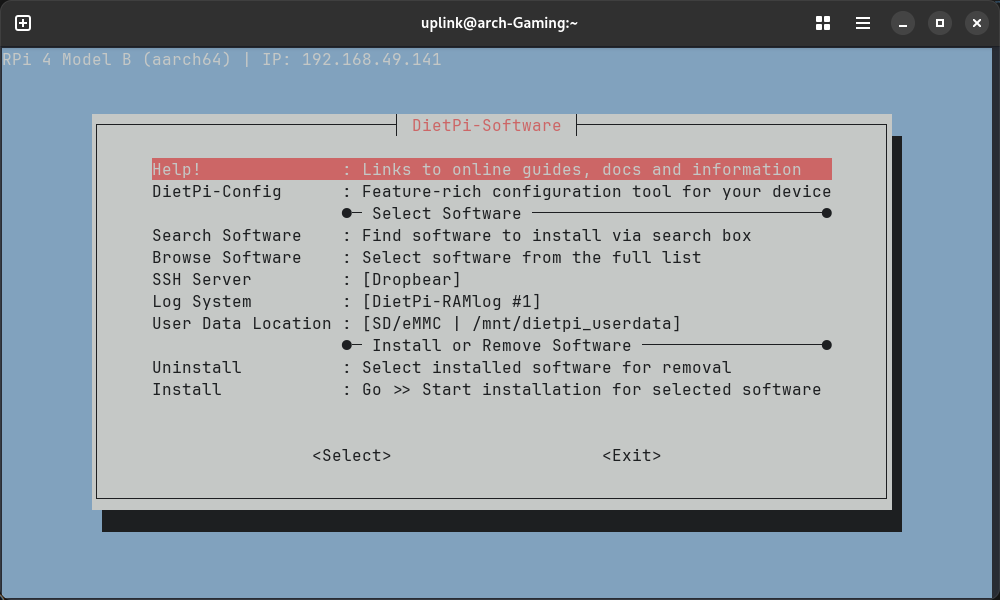
You will then be at the main “DietPi-Software” screen where you can choose what software you would like to install by navigating to “Browse Software” to take a look at the full range of optimized packages for DietPi for your system. For the purposes of this guide, I won’t install anything extra but regardless, when you are done, navigate down to “Install” and hit TAB to highlight “Select” and hit Enter.
-
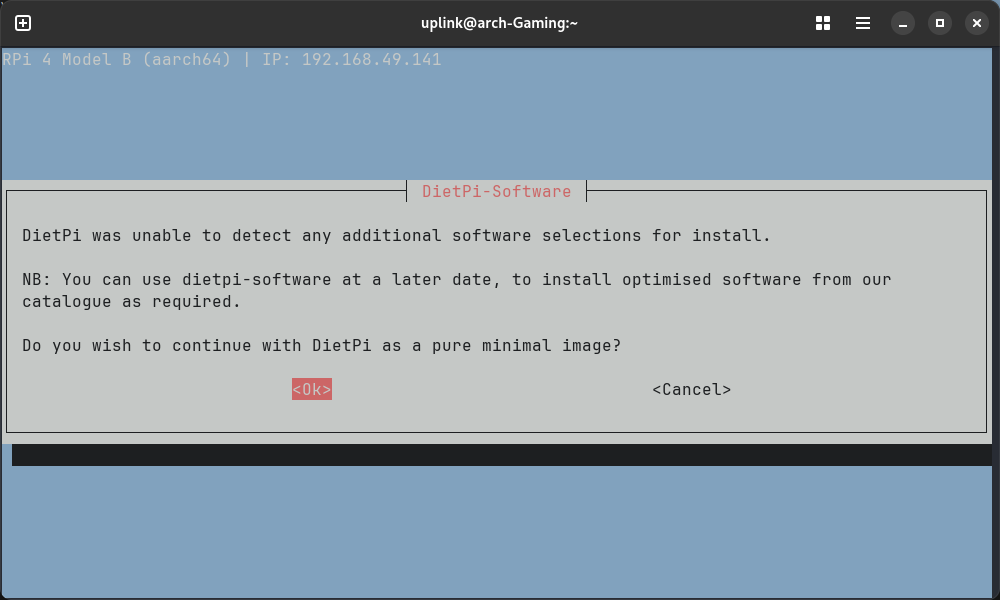
Since I didn’t choose to install anything, I get a warning about setting up just a minimal image. Navigate to “Ok” and hit Enter.
-
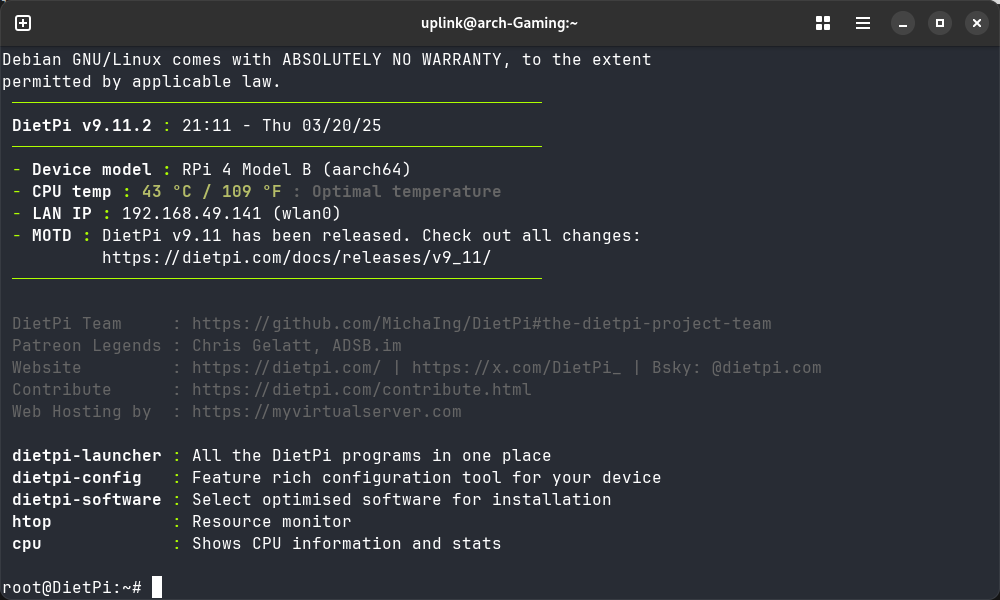
DietPi will finish its setup. In the end you will end up with a readout of the system and current status
-
A word of warning, you are dropped in the system as the root user which is dangerous to run commands in. I recommend dropping down to the normal user “dietpi” by running
su dietpi. Explore around with various differnt commands and the next time you remote in, usessh [email protected]orssh [email protected]so you start as a local user.
4. Final customizations: Setting this as yours!
-
Since the DietPi is now setup, if you are logged in as root, run
dietpi-configor if you have already started using the dietpi usersudo dietpi-config.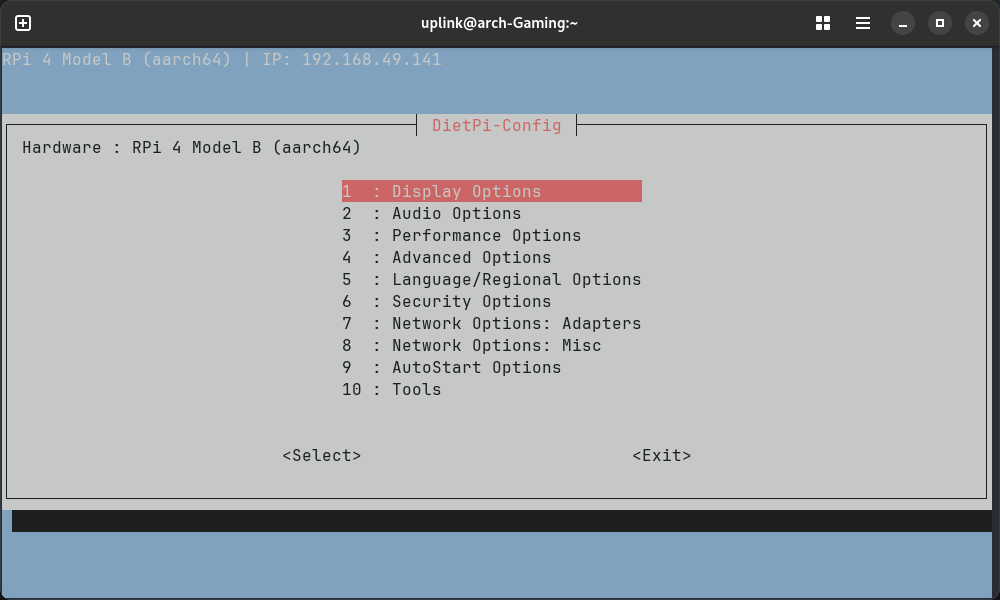
-
These will depend on your own personal wants with the system but in my case, I want to go for as lite as possible and I am also currently running headless (meaning no monitor) so I will disable the video output.
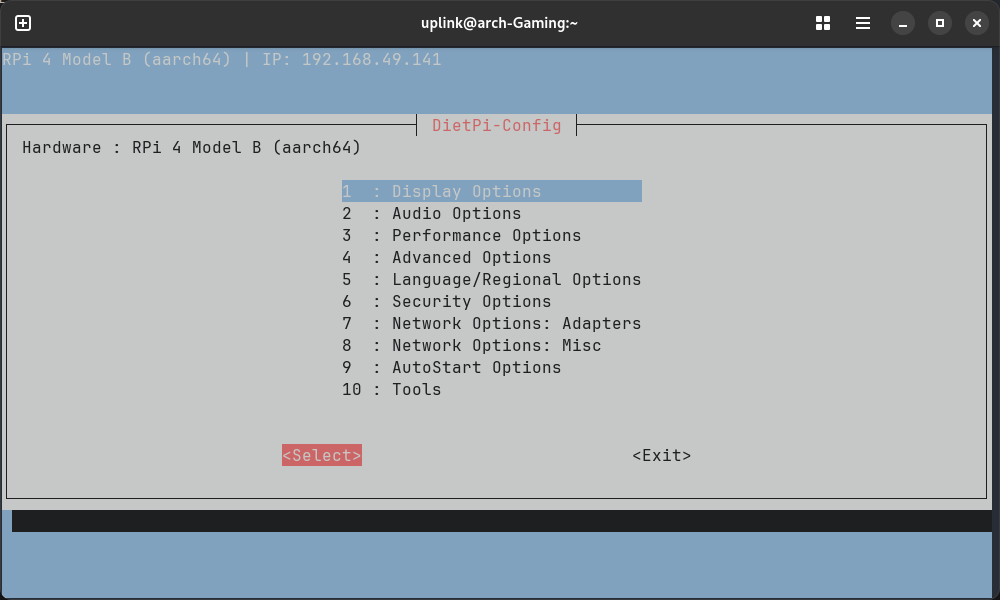
- Go to “Display Options” hit Tab to hightlight “Select” and hit Enter.
- Select “Display Resolution” hit Tab and Enter.
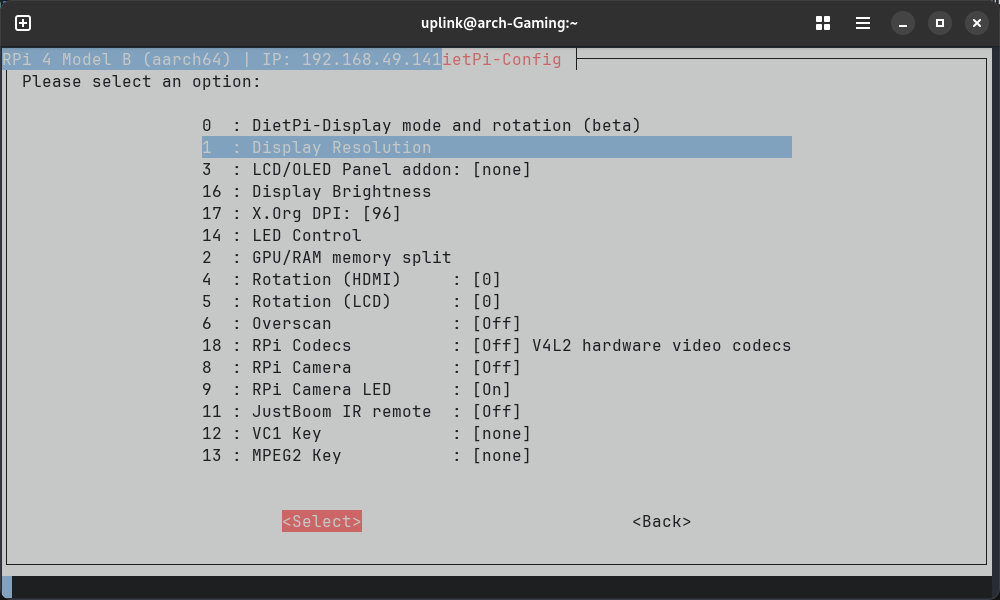
- Scroll down the list till you see highlight “Headless” and Tab and Enter once more.
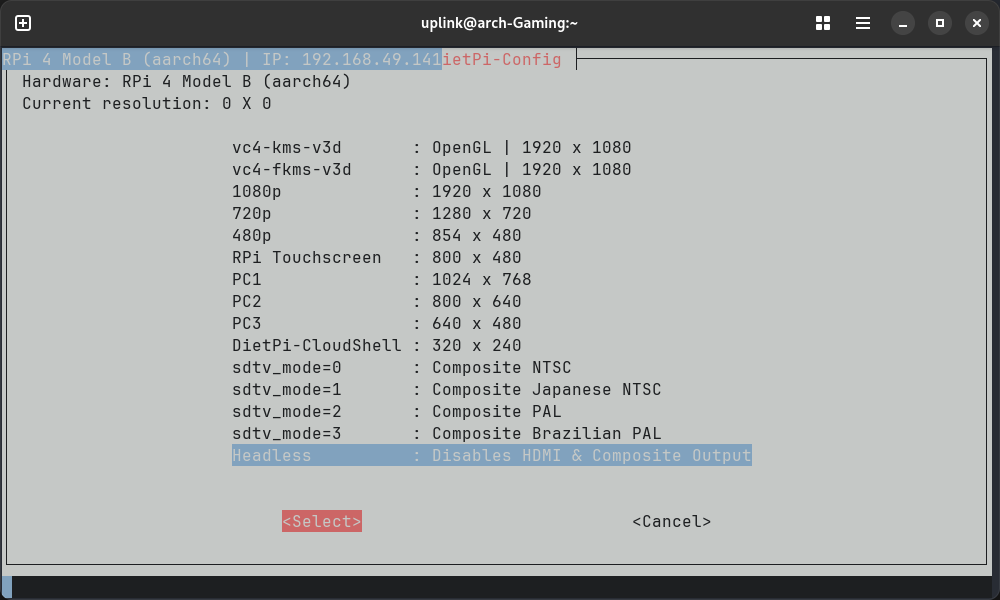
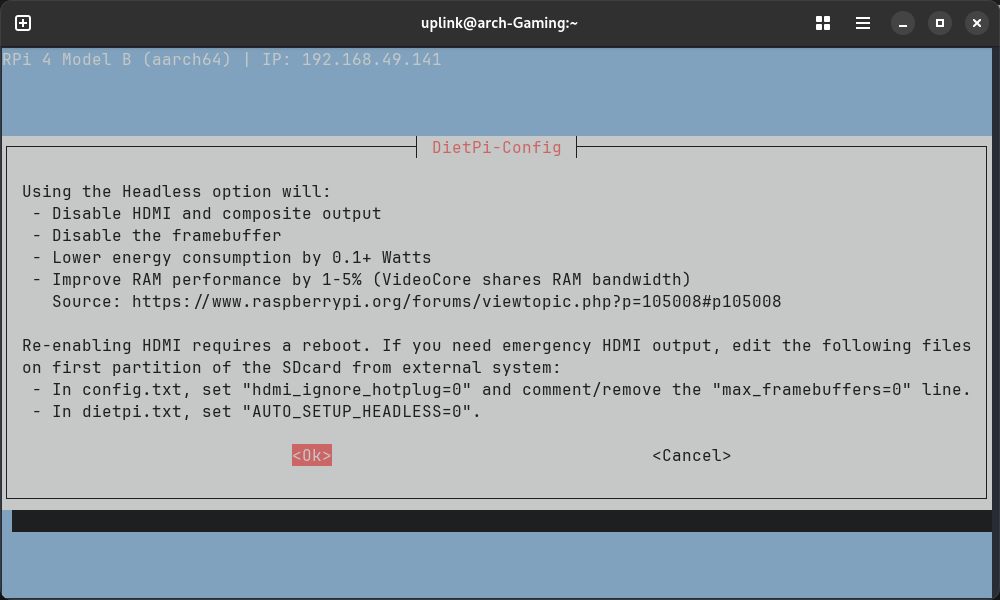
- You will get a info panel showing what using Headless will do. Big take aways it will lower energy consuption by a marginal amount and improve RAM performance. Also with instructions on if you need emergency HDMI output. Select “Ok” and Enter.
- Go to “Display Options” hit Tab to hightlight “Select” and hit Enter.
-
Set the DietPi for your local region and time.
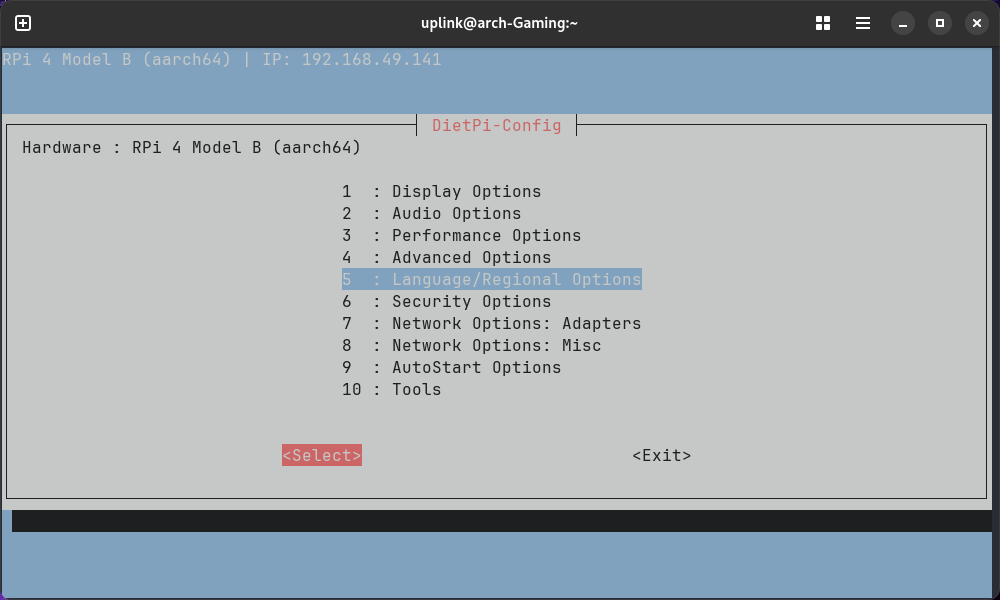
- Go to “Language/Region Options”

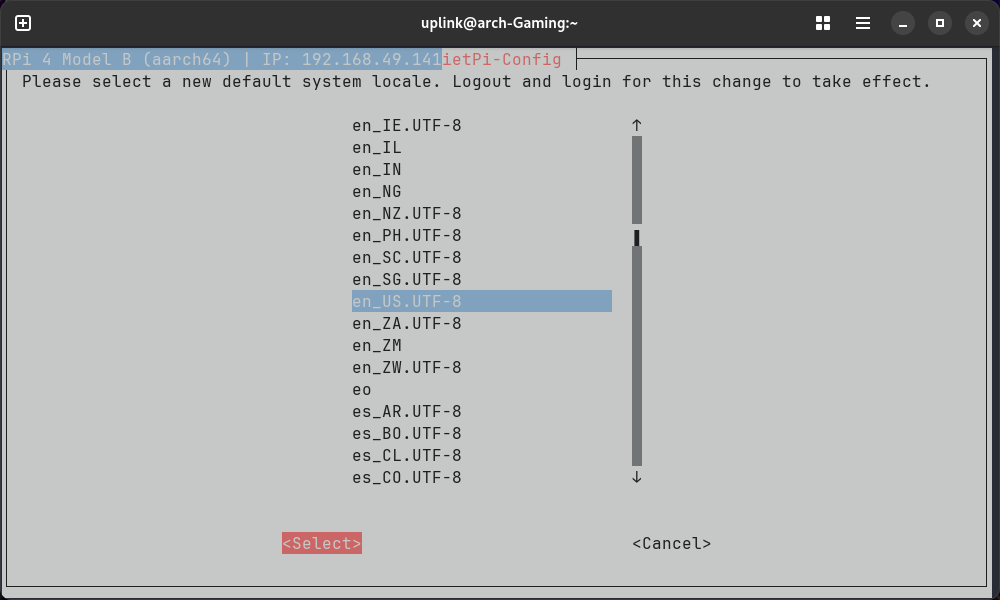
- Generally, you can leave “Locale” as “C.UTF-8” but personally I like it to be more local. As a matter of familiarity you would want it set to the region you most identify with. If you are from the United States of America, you would probably want to change the “Locale” to “en_US.UTF-8”.
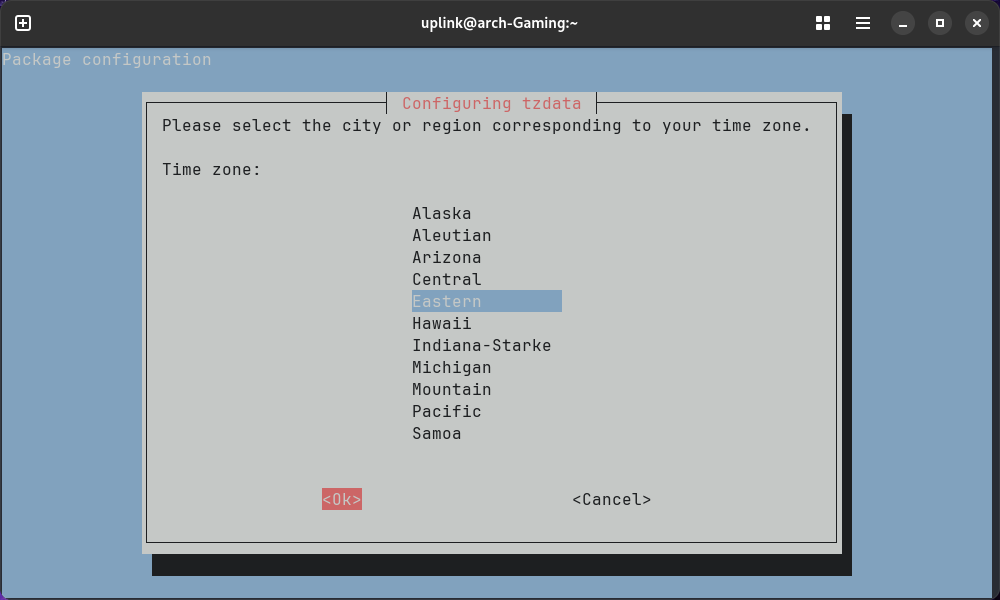
- Timezone is determined by the tz database so rather than trying to remember “Am I in UTC-4? Or was it UTC+7? Wait, is that before or after Daylight Saving Time?” You instead find the nearest big city in your TimeZone. By default it is set as “Europe/London” but again if your East Coast in the US, you change it to “America/New York” by first selecting the “Geographic area” in this case “US”
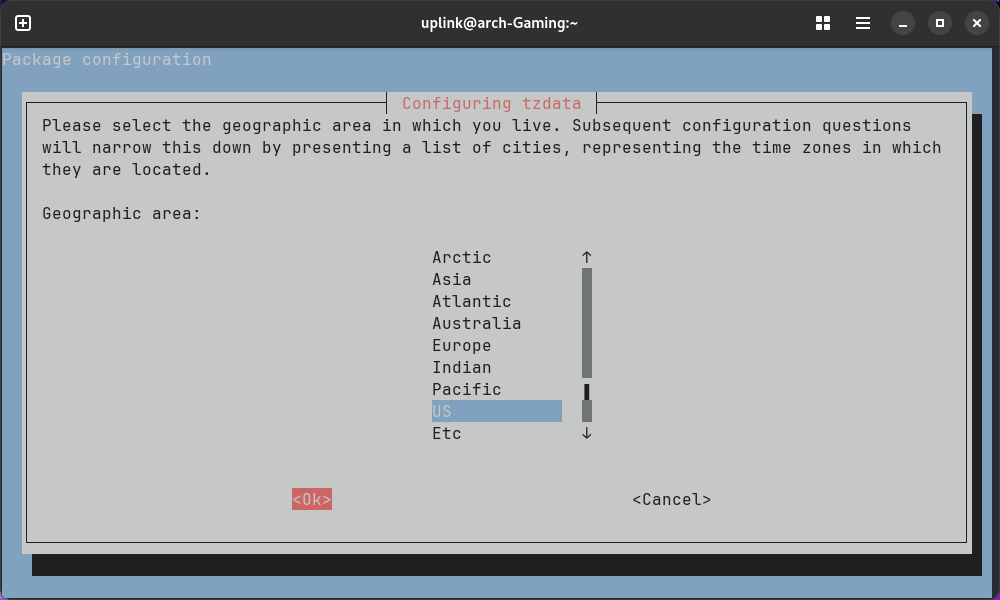 and then selecting your city or region for your Time zone
- Keyboard is setup the same way with the default being “gb” for Great Briton. If you are like me and using this setup headless, then there is no need or worry about changing it since there is no keyboard plugged into the DietPi to change.
- Go to “Language/Region Options”
5. Next Steps: What Can You Do with DietPi?
Now that your DietPi setup is complete, there are tons of great software to choose from! In the next post, we will be adding onto this one and turning our DietPi setup into a network wide ad-blocker. We will build on this as a base for further projects because this setup gives us so much flexibility to do anything; run a web server, practice python, run docker images, setup a media server, etc. The possibilities are limitless!
Conclusion
DietPi is a fantastic choice for users looking to run a lightweight, efficient, and highly configurable OS on their Raspberry Pi or other SBC. With its minimal footprint and powerful tools, it enables you to build versatile projects with ease.